1. Control Center Service
In a web browser:
Go to http://beta.salusfin.com/ and select Login from menu on top of the page or Go to https://control.salusfin.com/ and
sign in with your credentials (email address and password).
Set point on Central thermostat is adjusted:
- 1 degree down during N highest spot price hours
- 1 degree up during M lowest spot price hours
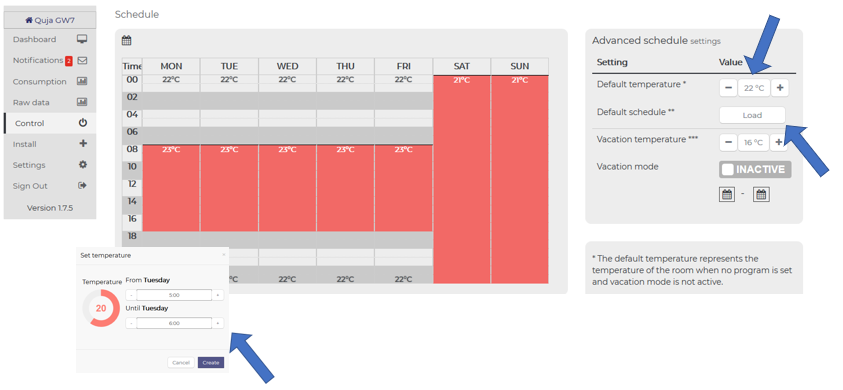
Adjusting the temperature settings from thermostat calendar icon:
Alternative 1.
- Set default temperature. Default temperature is used outside scheduled periods
- Create scheduling with temperatures for desired week days. You can use Default schedule Load-feature
Alternative 2.
- Set default temperature
- Create at least one schedule point (e.g. 1 hour) with temperature setting
- Schedule point temperature and default temperature can be the same
You can change schedules / temperature setting from browser at any time. You can use browser on mobile device.
You can see the set point from mobile client.
Vacation mode overrides spot price control. When vacation mode ends, spot price control will continue.
Spot price control will override temperature setting changes from mobile client.
Boiler is heated:
- During N lowest spot price hours
- In time window: 23.00-07.00
The number N is adjustable
You can see the relay status from browser / mobile client but Spot price control has control during 23.00-07.00. Outside that period user can control the relay from web / mobile client.
At 7.00 heating is turned off.
Vacation mode overrides spot price control and relay is turned off. When vacation mode ends, spot price control will continue.
When starting spot price control, please remove scheduling on the relay.
In case the upper water temperature is reached during heating, boiler’s own thermostat will interrupt heating => no overheating.
2. Installation
Turn on the router (insert it into the USB connector (correct direction) and check, the blue light will turn on for about two seconds and shut off).
Check that you have wireless network credentials available.
Steps
From the e.g. laptop screen (bottom right), select a wireless network, the name starts with NQ
Open the web browser and enter address 192.168.0.1 in the address field
Select your wireless home network, enter the credentials and press Save
=> The LED lights up in blue
For more information, see our User’s Guide on our homepage
Note: Gateway supports wi-fi routers channels 1-9 and frequency 2.4 GHz, check wi-fi routers setup. We have seen compatibility issues with gateway and wi-fi routers by Apple.
In case you have changed internet router, go to section 3.G to reset gateway settings and then return to 2.A.
Please refer to
Salusfin User Guides and Manuals
for detailed instruction on PIN-code installation (installing a prebundeled set) or installing individual components (Standalone installation).
3. Components
The Smartplug is a smart device that will let you to turn on and off the power of your connected devices. In addition you can see the power consumption of the device connected.
For more information kindly read our instructions.
If the LED flashes in the Smart Plug, it is not connected to the router.
Refer to the instructions for connecting / pairing components to the router / network.
During the installation process, you will find detailed instructions for each step of the installation.
You can fasten the Door / Window Switch and its magnet piece with the supplied screws or double-sided adhesive tape. Note the mark on the side of the sensor for the magnetic piece. The magnet should be 2-4 mm from the sensor when the door / window is closed.
Test the function: The LED flashes when you open the door / window.
It depends on where it is located (distance from router), and how often it will be waken up. Based on manufacturer information the battery under normal usage should last 1 year.
LED indicator on gateway provides information about different modes of operation. Patterns that can be observed are:
LED solid patterns:
- Solid blue -> all OK – gateway is connected through Wi-Fi
- Solid red -> network problem (the gateway could not connect to the router, was disconnected from the router or cannot reach the communication server through that router or incorrect Wi-Fi password was entered during installation)
LED blinking patterns:
- Blinks blue once and after that LED is off -> gateway is in access point mode (typically during installation or Wi-Fi reconfiguration).
- Blinks blue every 3 seconds -> gateway is working properly and is connected to the router (valid for gateways with 2xx firmware)
- Blinks green -> gateway is communicating with components on Z-Wave network
- Blinks blue every second -> gateway is downloading a new firmware
- Toggles between bright blue and dimmed blue -> gateway is decrypting downloaded firmware
- Blinks blue very fast (every 250 ms) -> gateway is updating firmware
- Blinks red -> gateway indicates serious issue – hardware or software problem
- Toggles between red and blue -> gateway attempts to re-connect to Wi-Fi after network problem
In problem situation re-start gateway. If the problem persists, contact support
Arrow down: temperature down
Arrow up: temperature up
Install:
NOTE: Thermostat can be installed only when M-figure is blinking on the screen
- Long press (~4-5 sec => M-figure in display), short press (first screen goes black, then blinking M-figure)
- => piston is pulled in and thermostat can be installed
- Once installed, Long press (~4-5 sec) => thermostat measures valve min/max positions, after couple of seconds temperature value is visible
- Thermostat is in operation
The first 1-7 days after installation the Living connect® Z is in a learning period where it will optimize the heat control of the room.
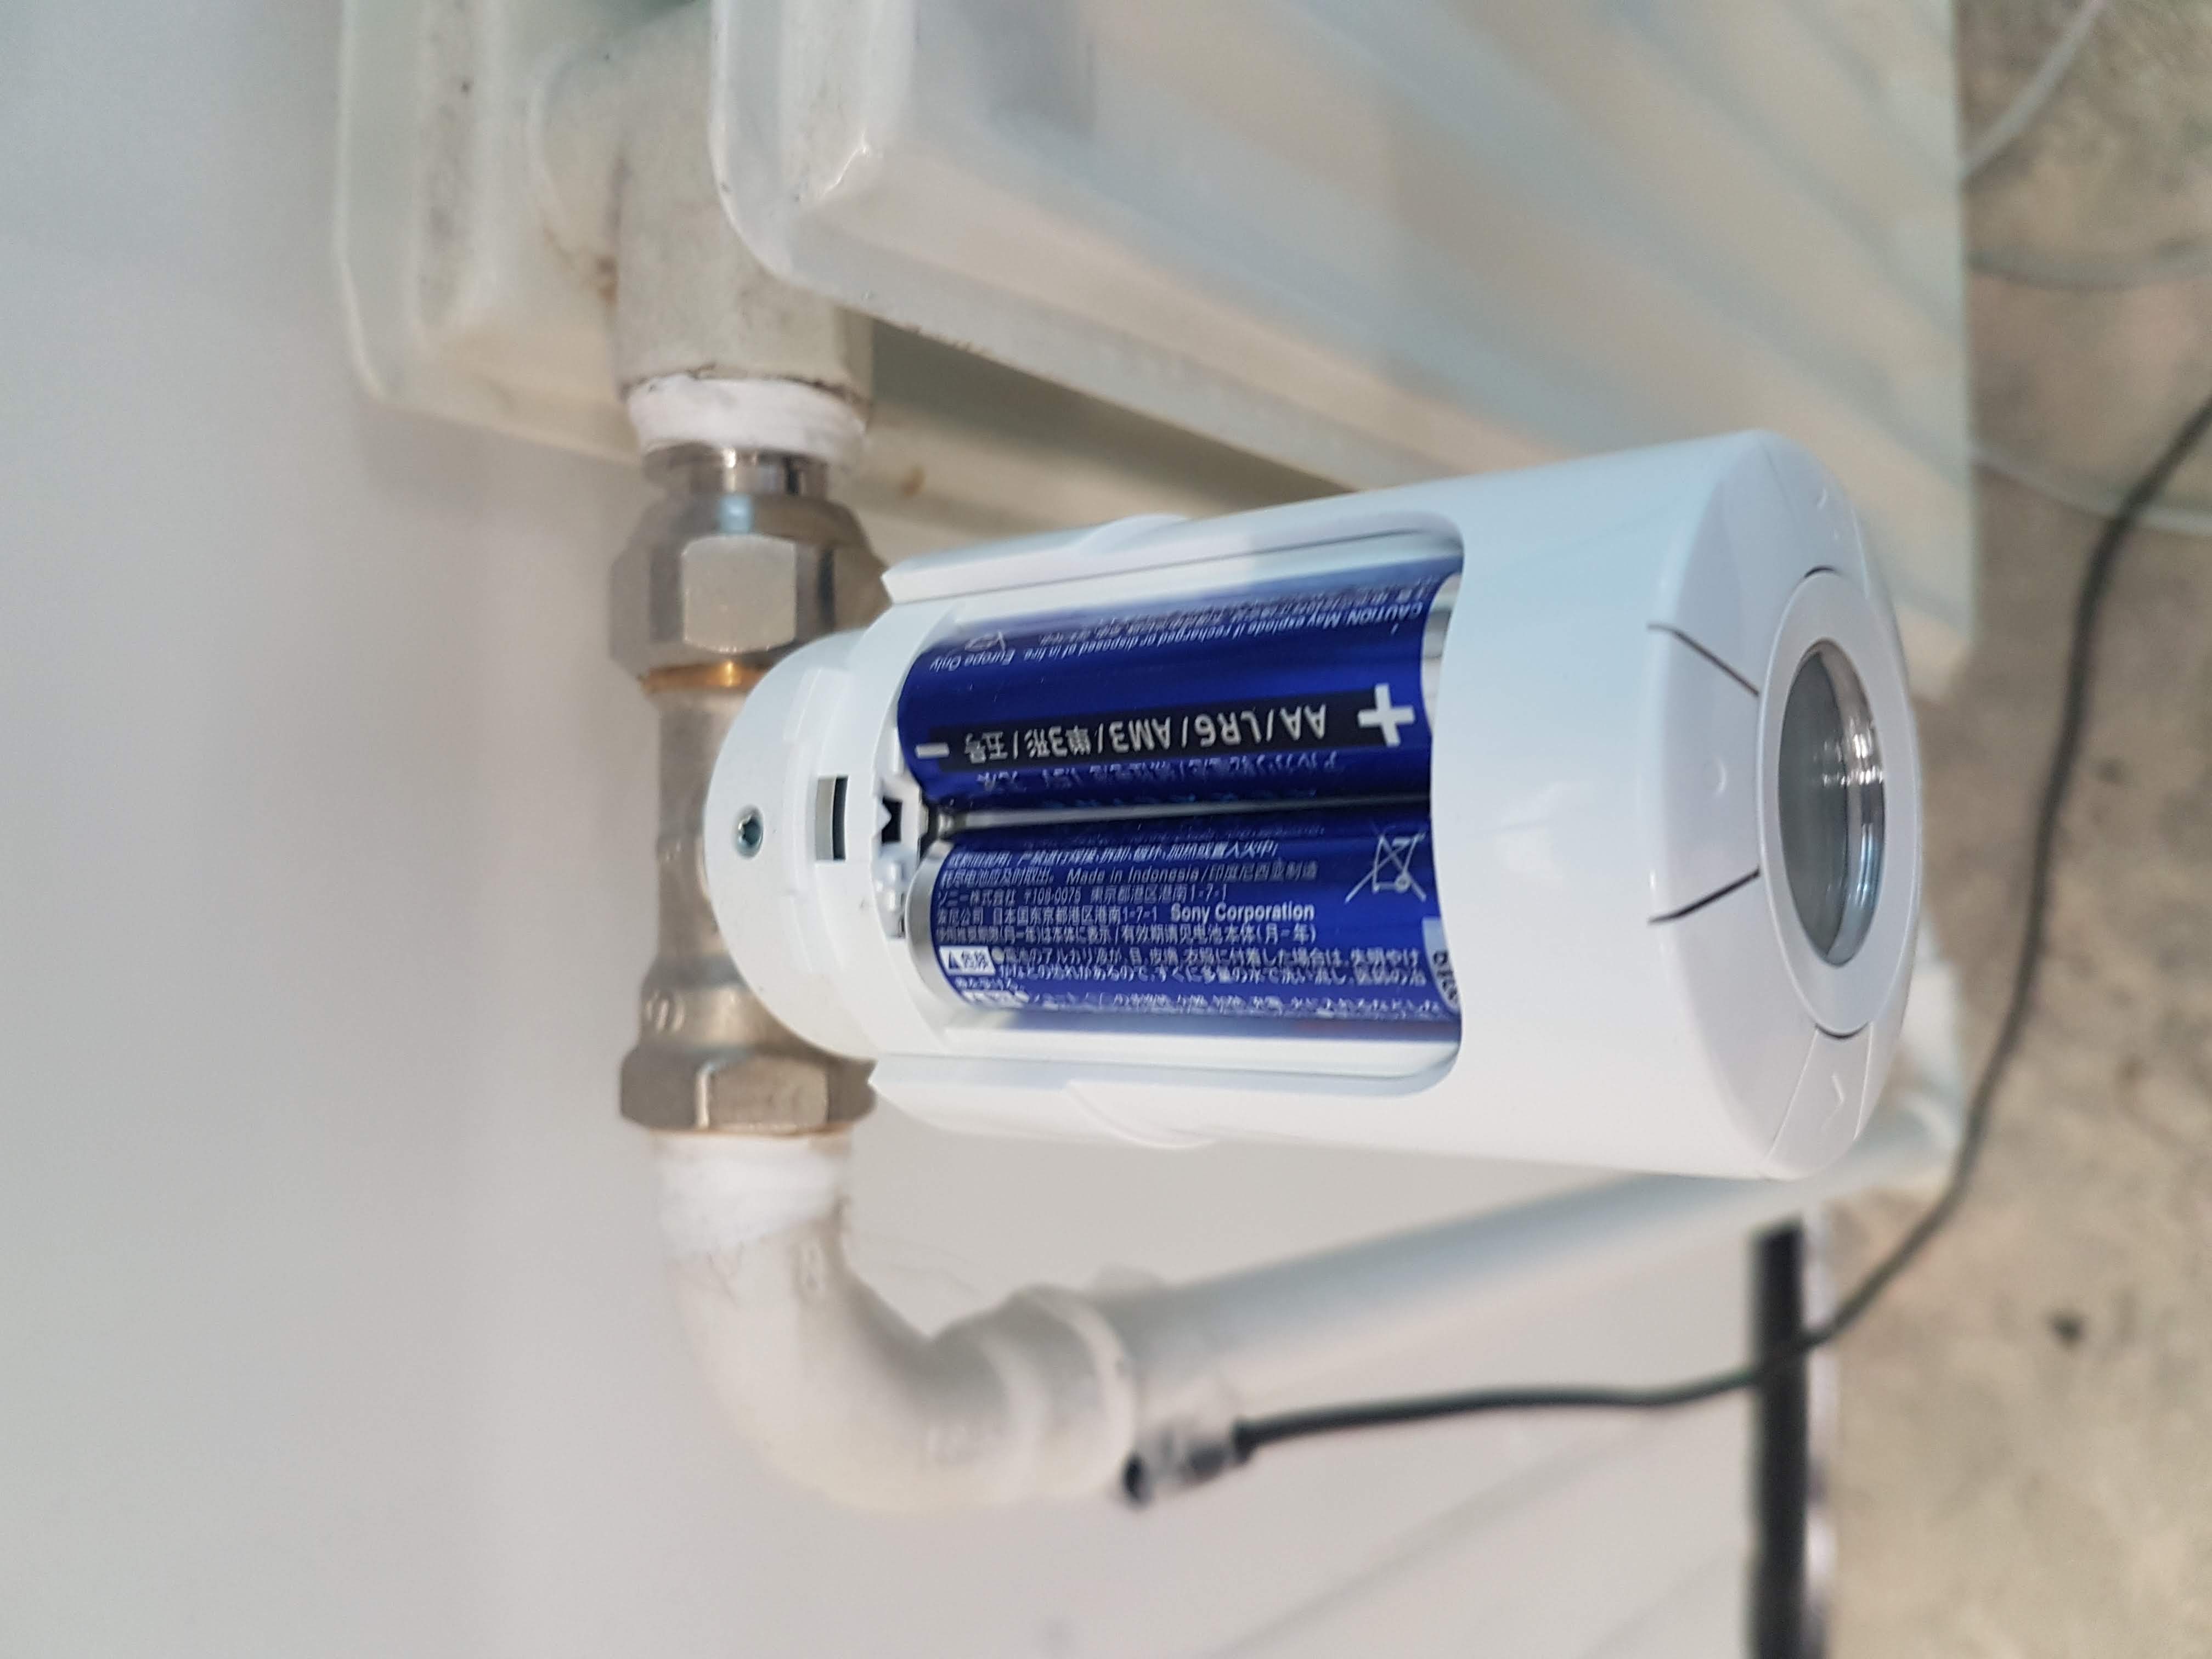
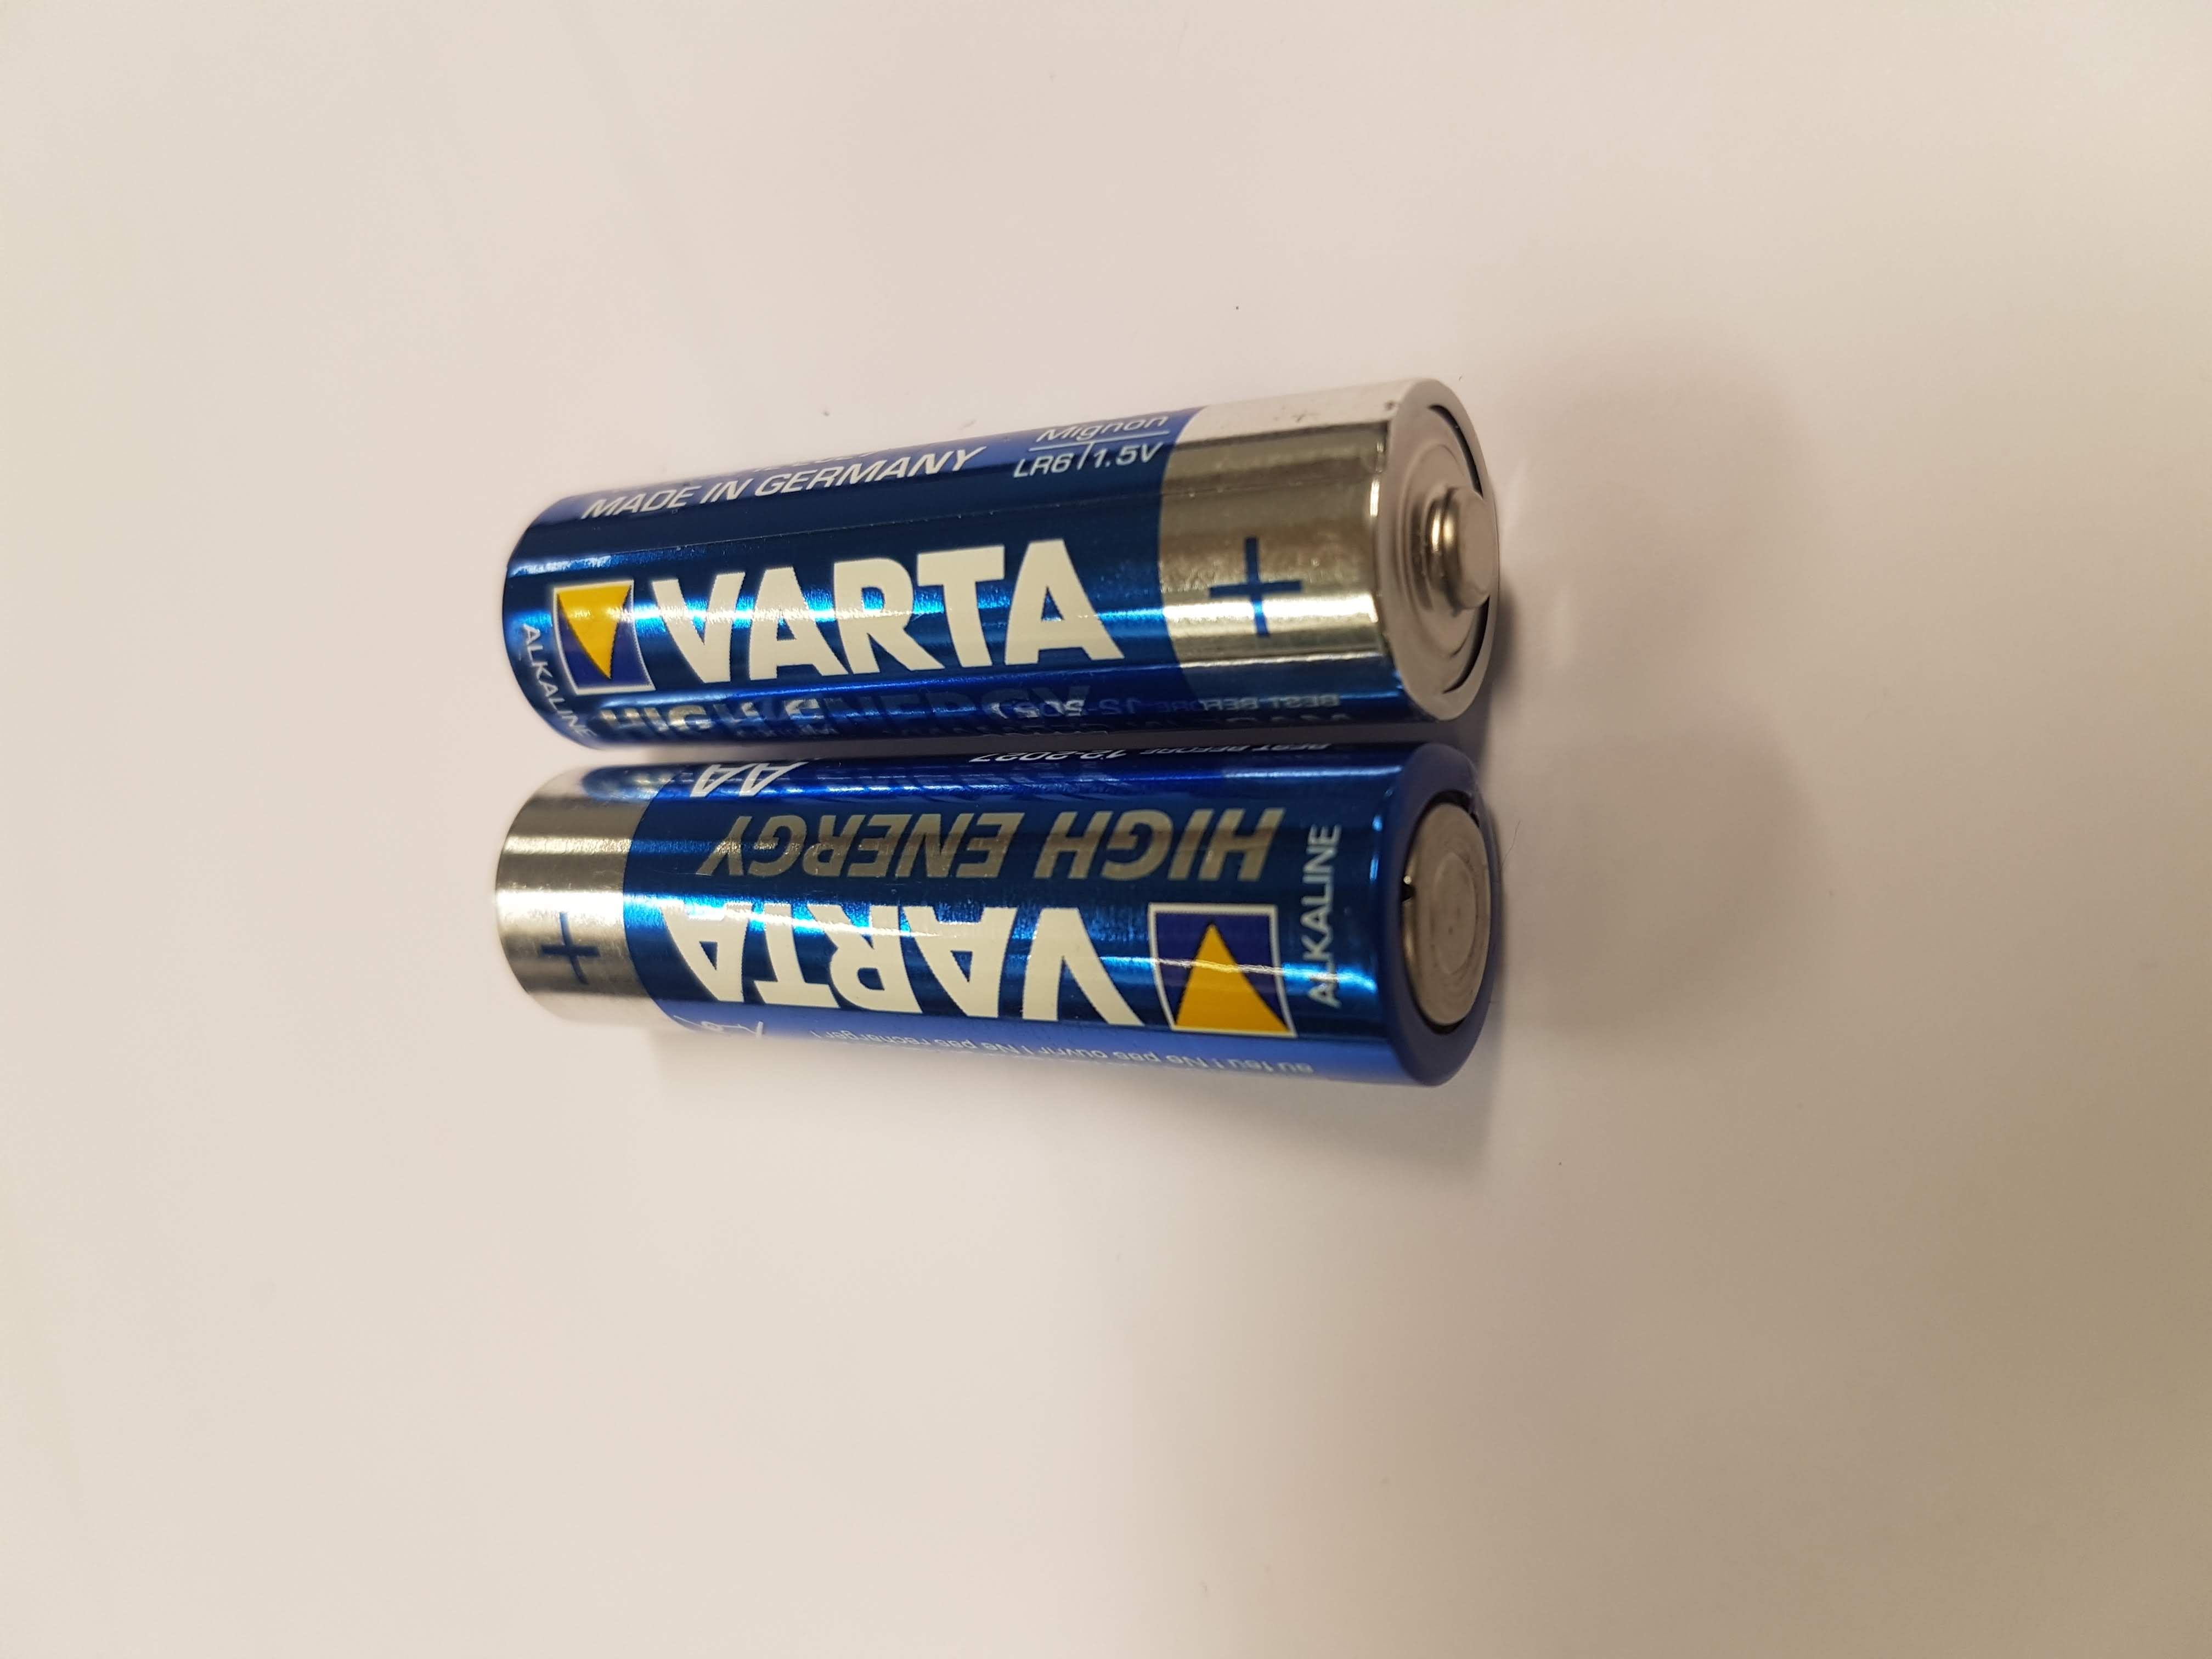
When voltage is getting low, the user interface will start blinking, indicating battery change. Standard AA-batteries are used.
NOTE: When changing batteries, pay attention on correct battery direction in chamber.
If you press accidentally the Install button, you will see a M-figure. Wait for some time and thermostat will regain normal operation.
For full instructions, check our website: Manuals from manufacturers

Changing batteries
Turn thermostat carefully to have the battery chamber pointing upwards. Remove the battery chamber lid.
Remove old batteries and insert new ones. Note the battery direction (see pictures below).
Turn the thermostat in right direction.
Check:
*After gateway installation, did you get notification, that installation was successful
*Was the gateway led blue after installation (continuously)
*Have you changed internet router password lately
*Is your internet router using channels 1-9 (=supported channels)
*Is your internet router using frequency 2.4GHz or 5Ghz (2.4GHz is supported)
Actions, in case internet router password on gateway was incorrect / you have changed internet router:
*Unplug the gateway, push the button and keep it pushed, plug the gateway, release the button after couple of seconds
*The led is turned off, gateway network configuration is cleared
*Install the gateway again =>Led turns blue
*Continue installing other components
Action, other cases
*Check home router configuration
In case you have changed internet router and reset the gateway settings according to instructions above, please return to section 2.A.
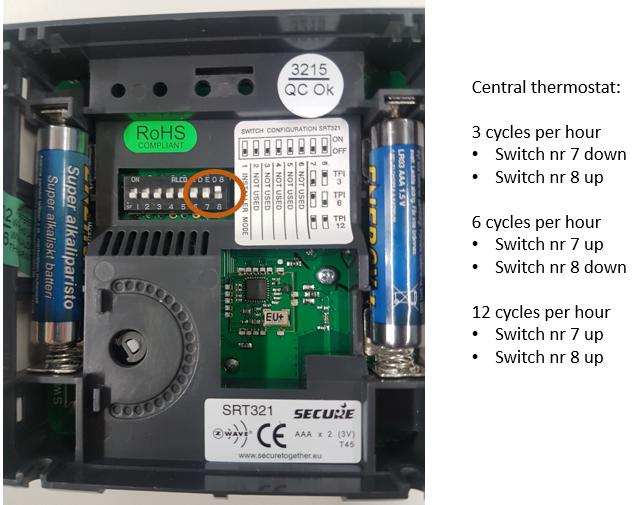
To adjust the cycles (how often the relay in controlled), open the Central thermostat and remove the back plate. Check the picture below on DIP-switch positions.
4. Device and App Usage
You can download Salusfin APP from iOS or Android stores or use the QR codes below.
iOS Android
The APP keeps track dynamically of what has been added at Salusfin Control Center
On the Home tab you select the device you want to add to Favourites by holding the finger on the device icon for two-three seconds and from the menu that appears select “Add to favourites”. Similar way you can remove icons from Favorites.
Upon first login you are asked to set a security code for your APP in order to restrict access to the APP in case you leave your phone unlocked. If you don’t want to secure the APP you can at this step click “Skip” and you will be taken straight into the view of your devices.
You can later in the Settings menu enable/disable and change security code if needed.
You can secure the whole APP or the video streaming (if you have Salusfin videocamera).
You can change the security code time out period in Settings.
If you have forgotten or lost your security code you can request a new one from the security code screen “Forgot security code”. Seuraavalla näytöllä sinulta pyydetään käyttäjatunnuksiasi (sähköpostiosoite ja salasana).
Under Settings (three stripes on upper left corner of the APP) you can modify/see various functions such as the security code, energy cost, appearance of the APP, how the device view is sorted (drag and drop) and About section with version details and links to EULA.
In Salusfin Control Center under Settings you can define the currency and cost of your energy per kWh / m3. This information is show in APP / Settings and used if you have a Power Reader installed.
The APPs are built for iOS and Android. iPhone 4 (iOS 7) and newer and for Android version (4.4) and newer.
Unofficial Android versions are not necessarily fully supported.
Some firewall and virus protection software can stop APP from functioning.
Tasks are used to automate scenes. Ensure the house is in unlock status when using Tasks. If user wants to use normal unlock and lock features, the tasks Holiday off must be active first.
Wake up task will turn on all smartplugs and disarm all security sensors, except Smoke and Flood sensors as that is always armed.
Holiday on allows the system to put the home in standby mode. It will arm all security sensors and turn off all smartplugs.
Holiday off takes the house back to normal usage and you as the user can use the lock and unlock functionality
Bedtime task will turn off all smartplugs and arm all door – window sensors. Motion sensors will not be activated.
Smoke and Flood sensors are always activated.
Optimization (=Doze) puts Android phone in deep sleep and apps don’t get notifications e.g. alarms.
On stock Android
- Settings
- Battery
- Three dots (upper right corner)
- Battery optimization
- Click Not optimized and select All apps
- Scroll down and select Salusfin
- Select Don’t optimize and Done
On Samsung phone
- Settings
- Device maintenance
- Battery
- Unmonitored apps
- +sign, Add apps
- Select Salusfin, click Done
In mobile app, press the lock icon (upper right corner). When lock is closed, the alarms are on (sensors are armed).
Note1. Smoke and Flood sensors need to be armed once (lock open=>closed). After this the sensors are always armed.
Note2. After alarm there is a cooling period of 3-10 minutes. During this period no new alarms are sent. After cooling period, the sensors are automatically armed.
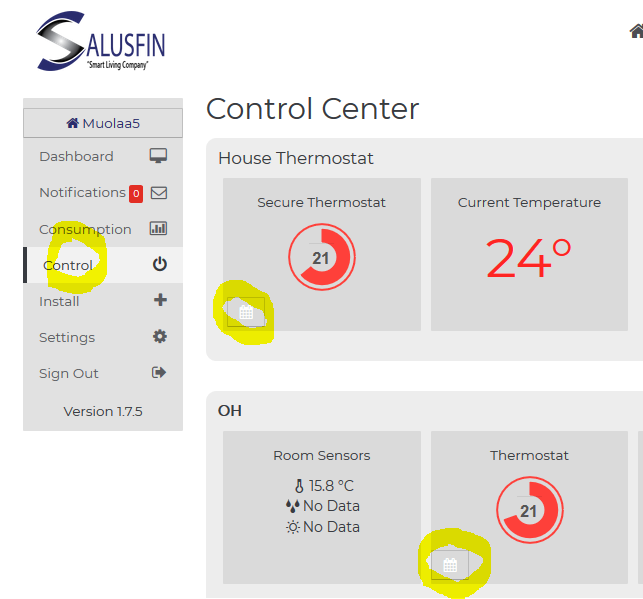
Scheduling works on thermostats, relays and smart plugs.
In ControlCenter Control section select the applicable component and the calendar icon on components lower left corner.
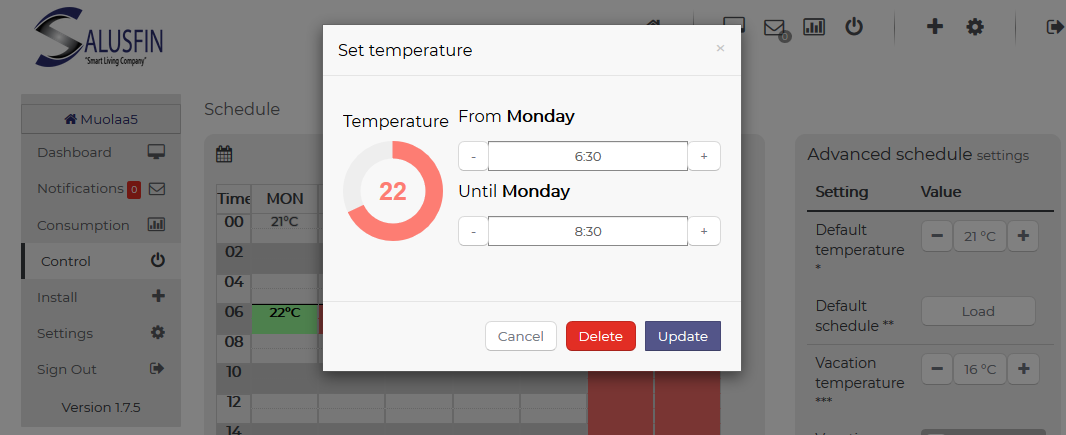
Select day and time, where you want to start the scheduling by clicking the time. In a window adjust start and end time and temperature (temperature in thermostats only). Continue to other days. You can adjust the default temperature outside the scheduling from top right corner.
An easy way to start the scheduling is to Load Default schedule and adjust it where needed.
Vacation mode: Activate the vacation mode and select start and end dates and times. Note: if vacation time is in the future, you will see the activation time in calendar icons. You can also select the vacation temperature (thermostat).
For relays and smart plugs you can select default value: on/off and in scheduling you can activate or deactivating the function.
5. Others
Salusfin helps you to utilize an effective charging solution scheduled to lowest electricity rate hours, thus giving you lower usage cost per kilometre.
The data flow is encrypted from components to cloud and mobile/web clients. Cloud platform in use is Amazon platform and all its services are available. Connection is always initiated from site, meaning no firewall etc opening is needed. E.g. scheduling service is local, no data connection to cloud is needed.
Salusfin respect your privacy. According to Terms and Conditions we are not delivering private data to third parties without customer’s consent. Detailed document can be found in Company-Terms and Conditions.